The Grove 0.9
The Grove 9
A big effort was made to take the tree models to the next level. Better mesh quality with smoother transitions, better UV maps and a welcome speed boost. And the freedom of adding as many different twig models as you like. But let’s start with the bend tool… Have fun growing!
Bend tool
This fun new tool is inspired by the Bonsai technique of wiring and bending branches. After wrapping a branch in metal wire, you can then bend the branch into a pleasing curve. Several months of growth will solidify the tension in the branch, and the wire can be removed.
This allows you to realign branches and make them grow in the direction you want them to – it literally adds a lot of flexibility. Quite a bit more flexibility than realistically possible – you can bend any branch regardless of its thickness without the fear of snapping. So while the bonsai technique is limited to small trees, you can now apply the same principles to shape full grown hero trees.
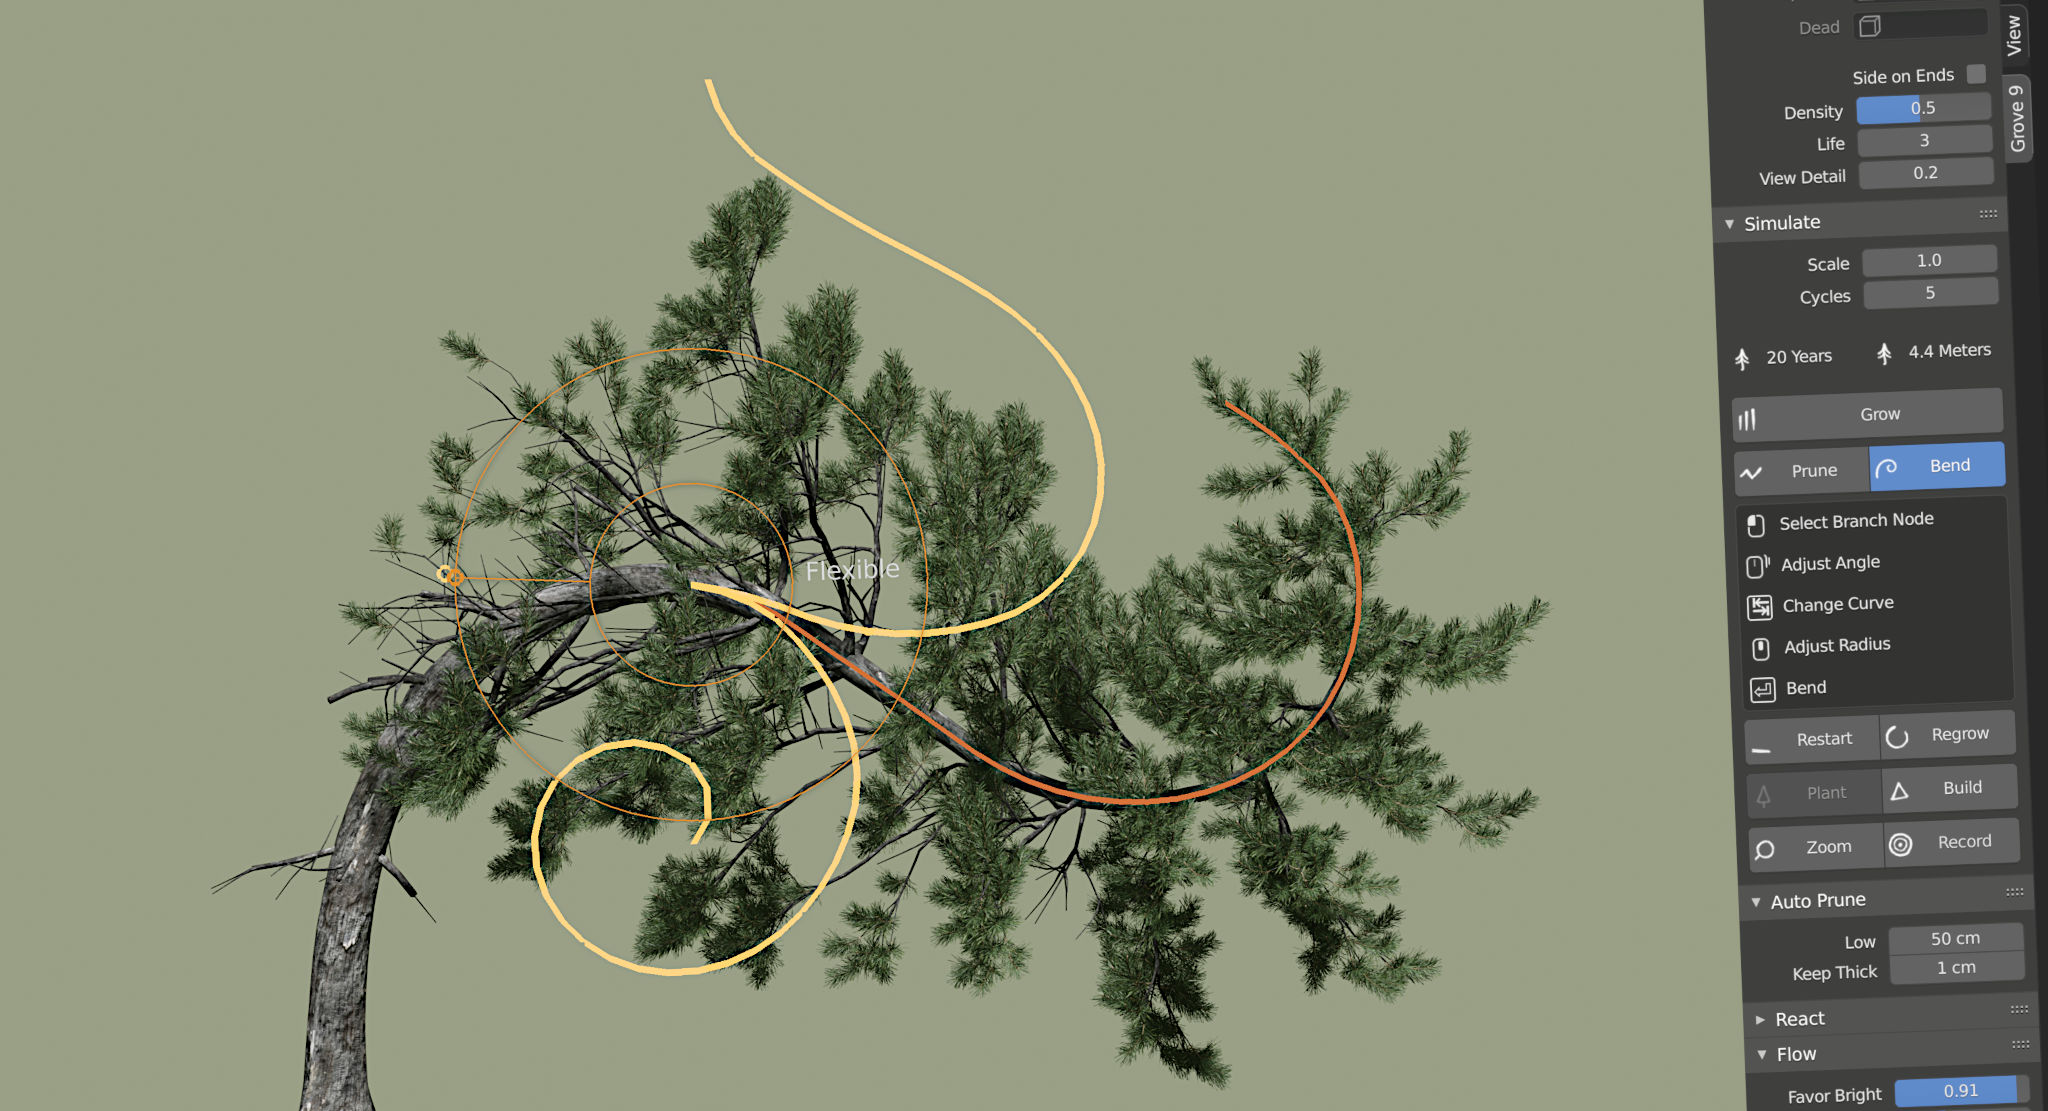
The tool adds a new level of interactivity to The Grove. It starts by selecting a branch node. Hovering your mouse will highlight the thickest branch node close to the mouse. Left click to select, then whirl your mouse around that point to adjust the angle. Use the scroll wheel to adjust the radius of the bend.
Curves
There are 3 different curves for the bend tool. Each creates a different shape along the bend. Automatic is a simple curve that gives a natural bend. Press tab to switch to the Flexible curve. Now you can increase the curvature along the length of the bend by moving the mouse closer to the origin of the bend. And then there’s a third curve that you can access by again pressing tab. The S-curve blends from a simple bend to a curling snake when you increase the angle.
Twigs, twigs, twigs…
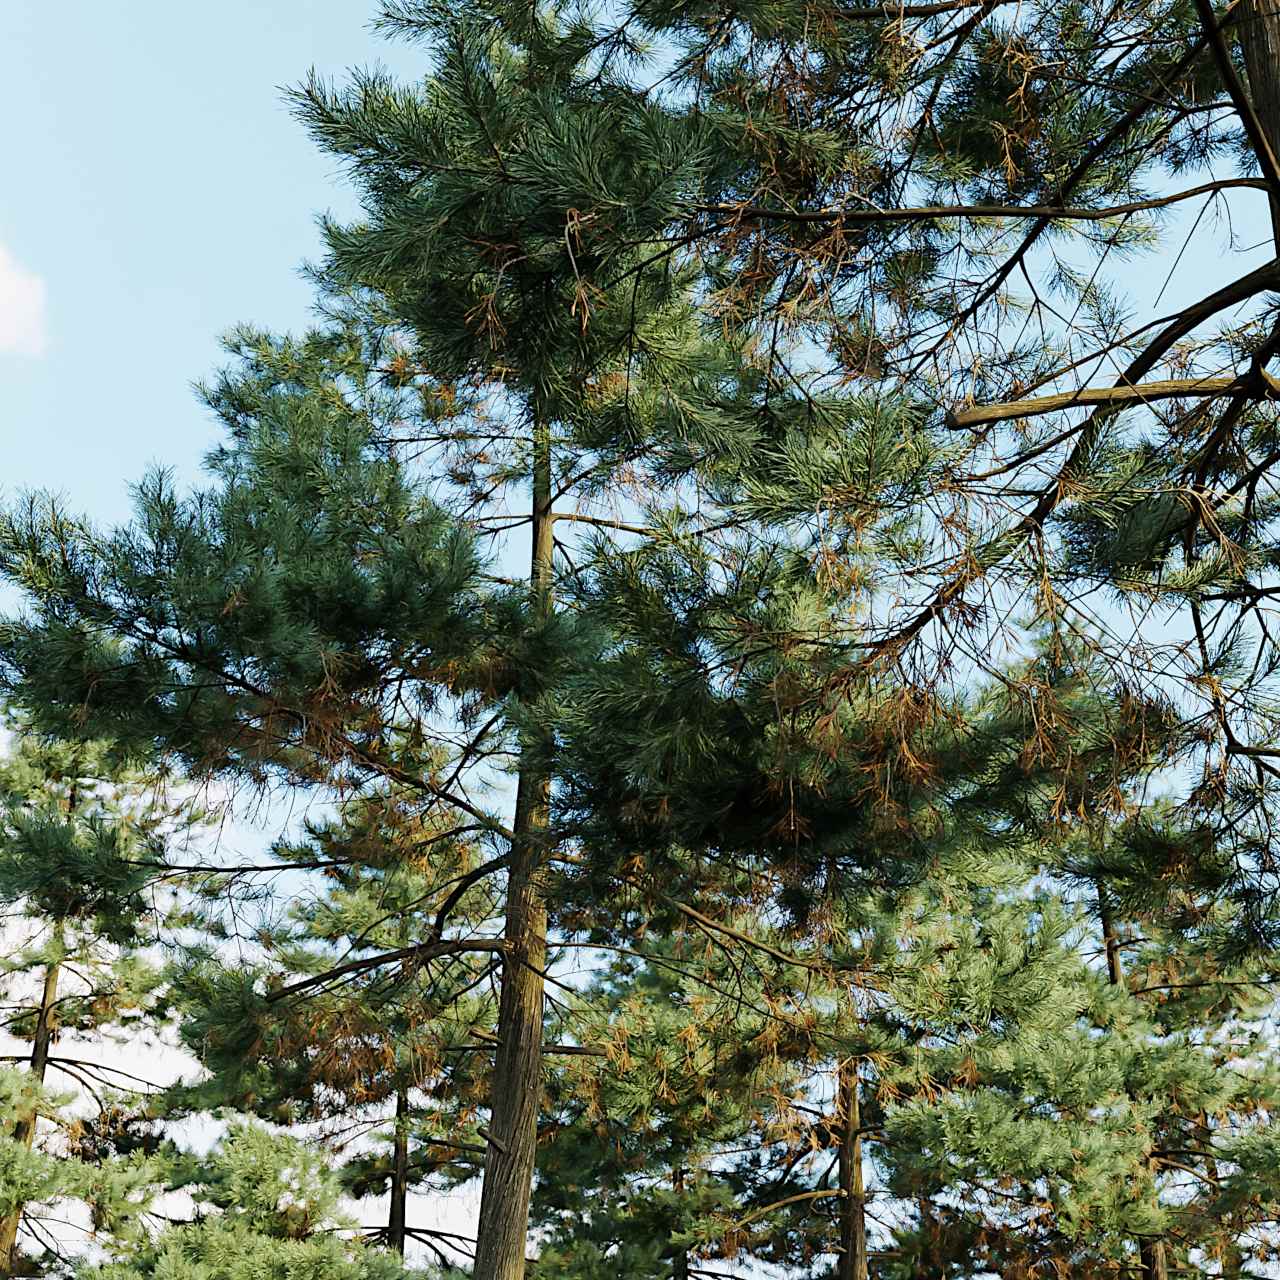
The Grove uses two types of twigs – side twigs and the often longer end twigs. This gives enough variation for many types of trees, with minimal visible repetition. It’s surprising that – on many trees – we could get away with just two twigs. But there are just as many trees that need more variation – trees with more distinct visual features.
Dead twig
While before dead branches were bare, you can now use a special twig to add more detail to the weaker parts of a tree, mostly the lower crown. A dead twig can simply be the same twig stripped of leaves, or it could be a twig with wilted or dry brown leaves. On a pine tree it can still hang on to several browned needles, curled up by drought.
Dead twigs appear on dead branches and they stay there for the number of years that you specify with the Wither parameter.
Upward twig
An optional twig object that that overrides the end twig when it’s growing steeply upward. Vertical twigs are often more powerful and even longer, and the leaves are arranged differently, so that they enjoy most of the sun. When a twig is growing nearly vertical, leaves start twisting around the branch while each one is facing up to the sky.
If no upward twig is set, it will use the same object that is set for the end twig. It’s completely optional. I intend start adding upward twigs to existing twig models soon.
Twig collections
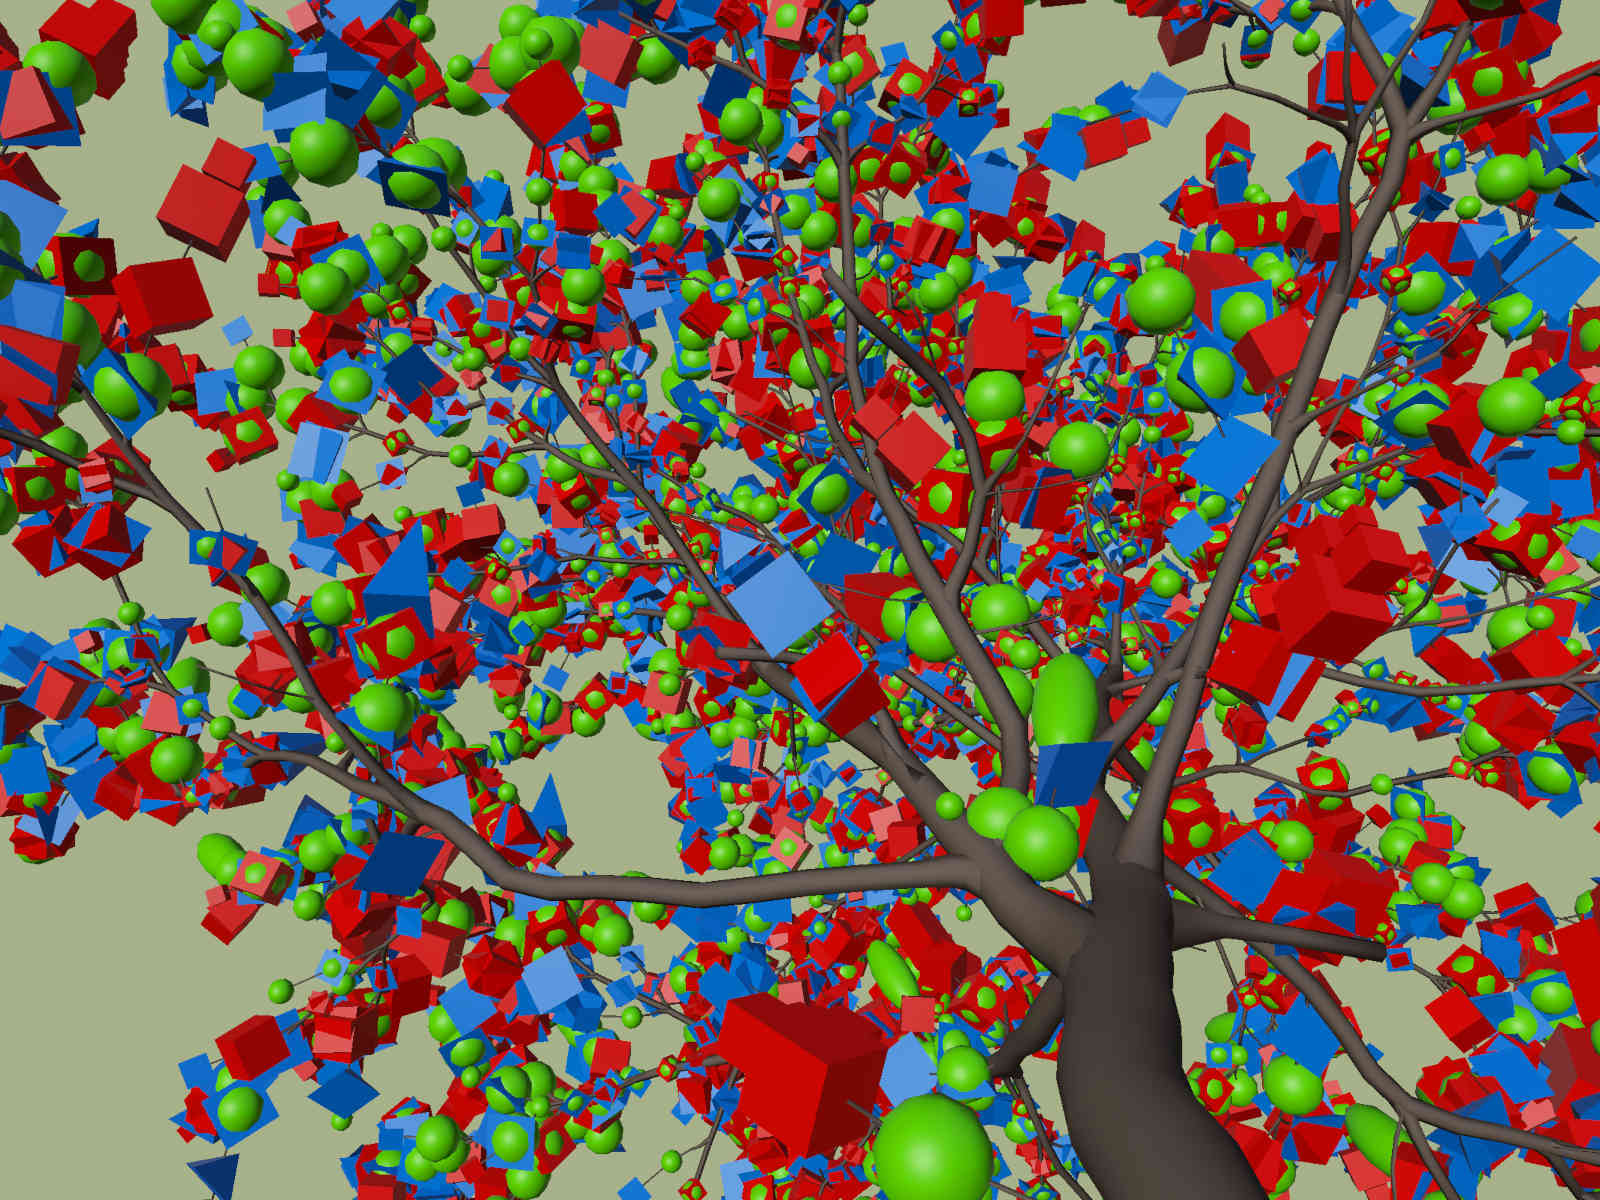
Instead of duplicating just a single end twig, and just a single side twig, entire collections of twig variations can now be used. Pick a collection and the objects in it will be randomly picked for each duplicate.
External twig files now also support this. Here’s how to correctly structure a *.blend file to be used as a twig, for listing in the twigs menu. It’s the same as a normal twig, but then put your twig models in collections and add ‘sidetwig’, ‘endtwig’, ‘upward’ or ‘dead’ in the name of the collections.
Now that there’s much more variation in twigs, with collections, upward twigs and dead twigs, it’s time to tidy up. Appended twigs are now neatly joined in their own collections inside the twigs collection.
Existing twigs
Existing twigs do not (yet) have the new variations for upward and dead twigs, I’m working on that. For now it’s pretty simple to add for instance an upward twig. Open the twig file and duplicate the end (apical) twig. Change its name, remove ‘apical’ from the name and instead add ‘upward’. Then temporarily rotate the twig to point up. Use Blender’s modeling tools to bend and rotate the leaves into positions that don’t defy gravity. Then when you’re done making changes, rotate the twig back to the original direction pointing right and save the file.
More twigs are underway and they will be rich with variations!
Better mesh building
Twist fix
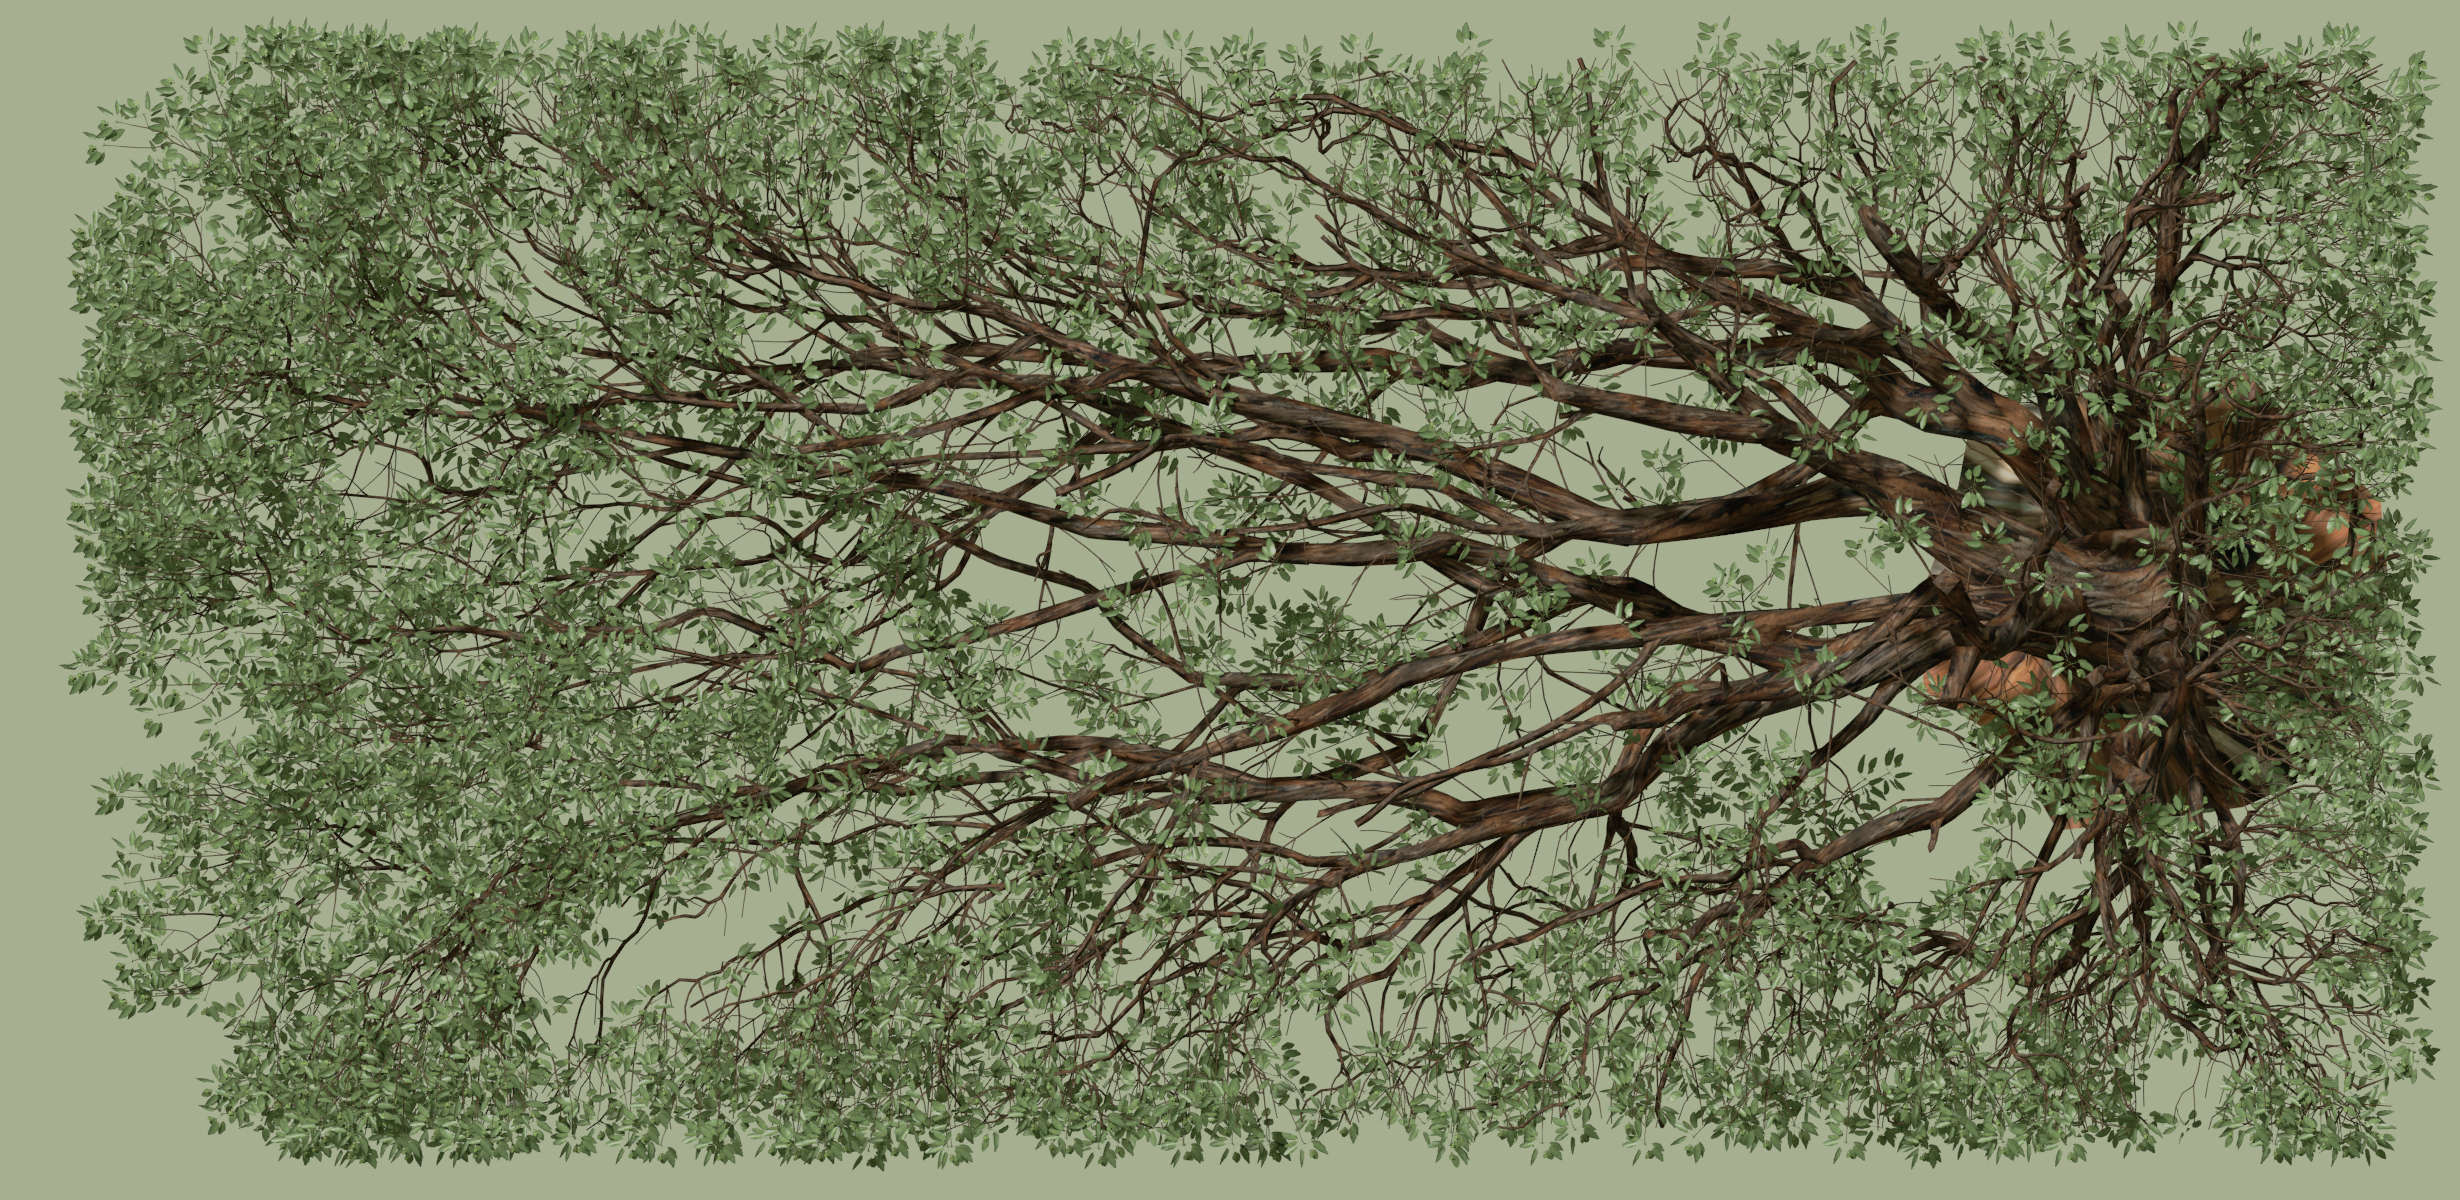
I finally fixed the sudden twists that would sometimes show up when building branches, especially on dangling branches and branches that make strange turns. With the new bend tool, these types of branches are far more common and so this problem really needed to be fixed!

Smoothly interpolated twisting along the length of the branch, no matter how crazy the twists or turns may be.
Smooth taper
I added something extra to remedy sudden steps down in thickness along the same branch. It detects an extreme decrease in radius, and then looks ahead one node further – and if that node has a much smaller decrease, it will smooth the branch for a natural taper.
Side takeover
When a side branch grows stronger than its parent branch, it becomes the new lead. This can create a sudden kink in the branch caused by the initial angle of the side branch. In nature this angle will be filled up by new growth to form a smooth transition. In an earlier release, I already tackled this problem, but I was adding an extra node to create a smooth transition. But it turned out that this extra node could cause problems when the branch gets thicker – the small internode length combined with the sudden angle could create ugly geometry instead of the desired smoothing. Especially when two branches continue battling for dominance, and the smoothing is applied multiple times, from one branch to the next!
So instead of adding an extra node, I’m now using the existing nodes and offset them to create a good transition. No matter how many times this smoothing is applied, it causes no problem.
Angles
Smoothing of sudden angles was a step in the simulation that was performed every year, ironing out the sudden angles along the length of branches. But the effect was too strong, so strong in fact that it almost completely nullified the effects of Turn Random Pitch and Heading. So now it’s a separate Smooth operator that you can find in the Build panel. It’s at your disposal when you want the smooth look, and you can even apply smoothing multiple times to increase the effect.
Branch smoothing modulation
The premise for smoothing at branching points is the formation of branch collars. These collars give the branch a fluid continuation into its lead branch. Along the way, I’ve improved this transition bit by bit. But I might have gone one step too far. The effect should only show up over time, when the branch grows thicker. If you look at young twigs, these just branch off at an acute angle, no smoothing whatsoever. So for this release, I’ve improved the branch smoothing to get stronger with thickness.
The improvement is two-fold. There’s now almost no smoothing on young branches, which will be the most visible difference. Second, basing the smoothness on thickness now allows to go much more extreme when the branch indeed does get very thick.
Dissolve
On thicker branches and trunks, nodes that are close together could cause ugly geometry when building the mesh. Dissolve fixes this. It’s done automatically each year, and improves the building of thick trunks by removing excess nodes. More distance between nodes reduces the chance of sudden kinks and improves the smoothness of the trunk.
Faster
Talking about mesh building, I optimized it to make it much faster. It turned out that adding data layers took more time than building the mesh itself. So the first easy step was to disable the Age and Dead layers by default. If you need them, you can add them.
Then I optimized the conversion to vertex colors, making that part twice as fast for each layer.
The (internal) branch index layers now build incredibly fast, which by itself shaves off almost half a seconds from building a mature tree. Together, these speed gains add up to a noticeably faster build.
Improvements
Release 9 incorporates changes that stem from your user input. By far, the two most asked questions were how to grow trees at specific spots, and how to make the main branches thicker. These two things have been made much easier.
Plant
A question I get often is how to grow multiple trees together, and from specific locations? You could do so by adding empty objects that mark the locations. It’s been there forever, but not many users knew about it.
To un-hide this feature, and hopefully make it used more often, The Grove now starts with an empty object at the scene origin. This has the same effect as before, but I’m hoping that the visible arrow will invite users to move it around and experiment.
You can duplicate it, delete it and point it in any direction of your liking. Then Restart or Regrow to grow from the new locations.
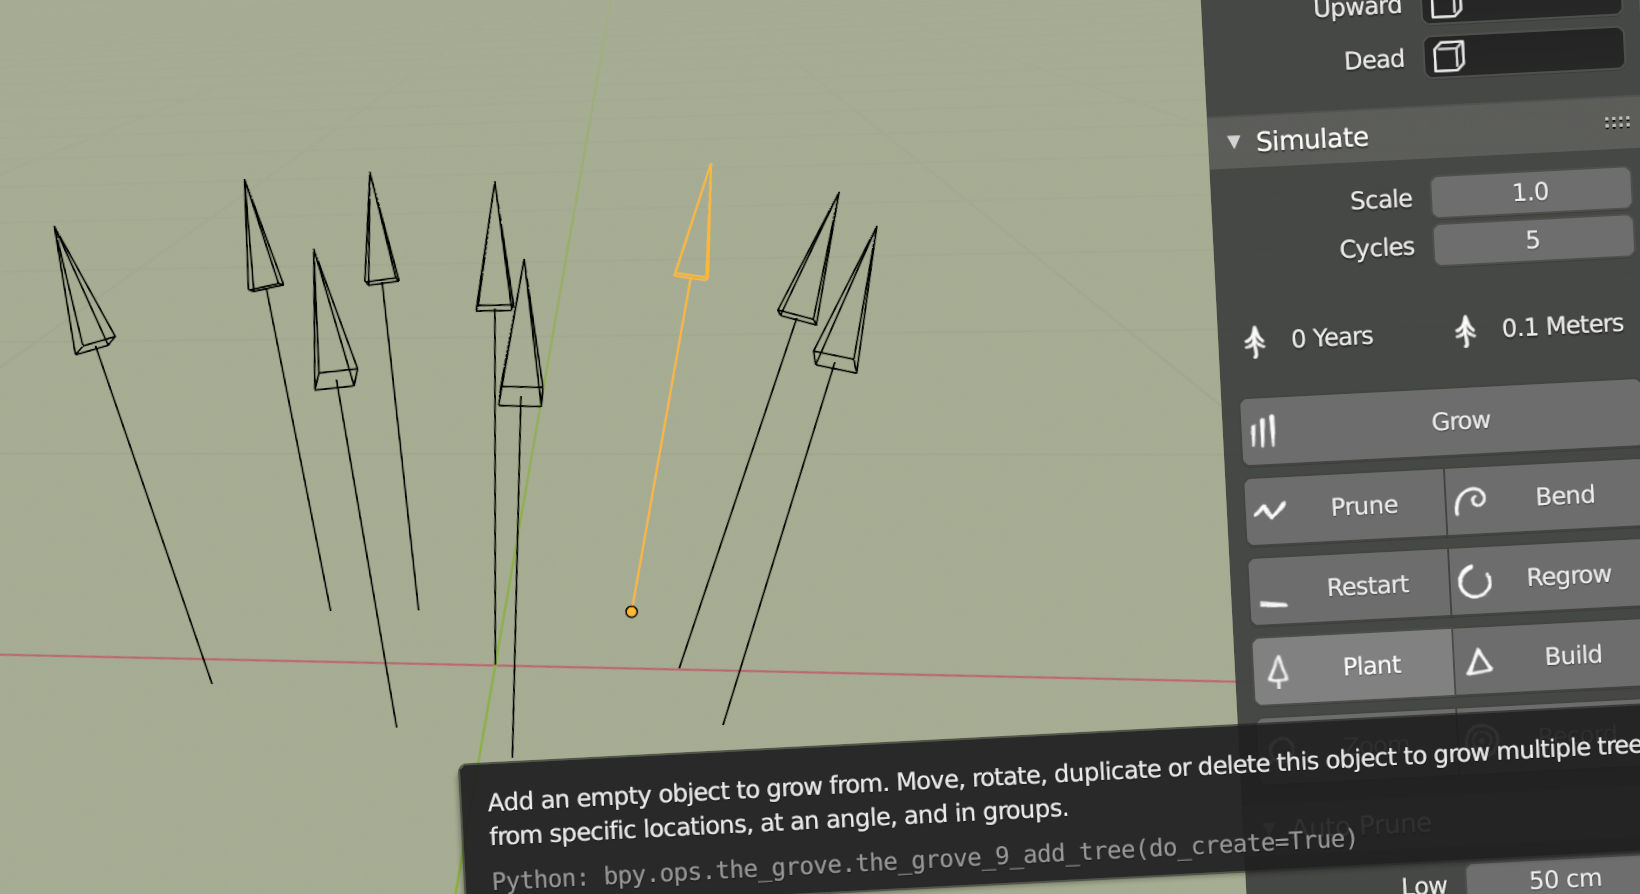
I also added the Plant operator. It’s a simple button that adds an empty object to your grove collection. You can easily do the
Same with Add > Empty > Single Arrow. But again, I’m trying to promote this feature. And there’s a little extra: repeatedly click
Plant to add each new tree in a phyllotaxic pattern.
This replaces the (number of) Trees parameter with which you could previously control the number of trees. And also the Space Between (trees) parameter is gone.
Boost
If you are happy with the tree character, but only want to boost the thickness of the trunk and main branches, use this parameter. Boost is purely visual and does not affect the simulation, unlike a normal increase in thickness that would add strength and reduce bending.
Like the simulation scale, this parameter can quickly change the look of your tree without having to worry about the side effects it will cause.
Most people seem to have a skewed mental image of trees, where the trunk and main branches are much thicker than they are in reality. I know, because I used to be one of them. Trunks are thinner than you may think. But be as it may, still one of the most asked questions is how to get thicker trunks. And to do this by tweaking the preset with regular thickening parameters will cause side effects in bending. To make this easier, I came up with thickness Boost. Boost will have most effect on thicker branches and it won’t touch the branch ends, so twigs will still attach fluently.
Replant
Automatic replanting allows you to freely move trees around your scene and continue growing and pruning in the new spot. Rotate the tree to face its best side to the camera. Or rotate the tree at an angle, maybe to simulate a fallen tree, and then continue growing from there (you will want to turn off automatic pruning when doing this).

Use Blender’s regular move and rotate tools to arrange your trees. Then simply rebuild or continue to grow, bend or prune and The Grove will automatically see that you moved your trees. Notice that when you rebuild the tree, the new angle changes the bending.
Files
The Grove stores your tree’s simulation data to allow you to continue growing, pruning, or even to add wind and additional data layers later on. I don’t want to pollute the Blender file with this data, so it’s written to a file on disk. Before now, these files were saved inside The Grove’s addon folder – now it’s saved in the same folder as your saved *.blend file, creating a sub folder called Groves.
Update – new versions of The Grove store the simulation in the Blender file! The data is saved on each grove collection, which works beautifully with Blender’s undo system.
Your trees can now move along with the blend file, perfect for backups or collaboration. And you can actually delete the files if you don’t need to further modify the tree.
When working in an unsaved file, your trees will still be saved to the temporary location. If you’ve been experimenting a lot with The Grove, you may want to check the Grove folder for old .grove files. You can delete them if you need the disk space. Note that when you delete the files, you can’t continue growing these specific trees.
Tools

Select linked branches
With this new tool you can select entire branches in edit mode. Use it after you’re completely done growing. You can make some final adjustments to the mesh, like removing branches, rotating them, even scaling them or moving them around the tree. All using Blender’s default mesh tools.
Start by selecting a single vertex of a branch. Then the tool will take care of selecting the entire attached branch, along with all the child branches and all the tiny twig duplication triangles. It’s very hard to select all these loose parts by hand, and so this tool will make that easy.
You can find the tool in The Grove’s panel, when in edit mode and more specifically in vertex select mode.
Make particles real
This tool will convert particle twigs to real objects. This is similar to Blender’s own Make Instances Real, but this this one saves the animation of every instance. So that it can be used with wind animation.
This may be useful for exporting to certain file formats. And it can also be used to duplicate trees with particle systems. It is a well known limitation of Blender that it does not support nested particle systems, but you can however use an entire collection of objects as an instance.
Select your tree with wind animation applied, then use Blender’s search tool (Spacebar) to find Make Particles Real. It takes a while to process and it runs over every particle system across the current frame range.
When using this tool, it’s best to grow your trees in a separate file and to link in the tree collection into your final scene. This is because of the sheer number of twig objects being created. Also note that the tool will not touch the particle systems themselves. After running the tool you will want to either disable the visibility of the tree’s particle systems, or remove them altogether to prevent duplicates.
I consider the tool a work-in-progress, because it doesn’t yet have a user interface. If it turns out useful for you, please let me know and I will put more work into polishing it.
Small features and changes
- Improved the UV map to fix the jagged edges and instead give a clean rectangular shape.
- Added big buttons that appear when you haven’t set your twigs path and / or your bark textures path. Both buttons invoke a file browser and allow you to set the folders right from the interface, instead of being hidden in the preferences.
- Progress bars now go all the way from 0 – 100 %, and they now include mesh building as a separate step. Thanks to recent improvements to Blender’s interface, The Grove’s progress bars have now moved to the status bar. When you grow or animate wind, you can follow the progress down below.
- I noticed that whenever I zoomed in to the entire tree, the next step I would take is to move to the front view. So let’s just add this step to the zoom tool already. When you’re already in an orthographic side or top view, Zoom keeps that view and just zooms in. So only when you’re in a perspective view, it will set the view to front.
- Have you created a preset worth sharing? It’s stored in a *.seed file in the Seeds folder inside The Grove’s addon folder. It’s simply a text file with the values you’ve set for each parameter. You can share these presets and you can now easily install them – copy them to the right folder – with “Import Seed File…” in the presets panel.
- Move the Rebuild button to the top of the Build panel, so that it is close to the Thicken and Bend panels, which also require rebuilding. Now it’s nicely in the middle.
- Save the last grown age to allow Regrow to also work after having pressed Restart.
- Toggling the dead branches preview (Stick Around) now automatically rebuilds the tree.
- Twig Age Limit was a strange name, instead just call it Life.
- Renamed Rebuild to Build – the “Re” didn’t add much.
- Remove “Set Scene Units” from the preferences. Because Blender now defaults to units, it’s a conscious user setting if a user doesn’t want units.
- Add “Use Adaptive Units” to preferences. Some of The Grove’s parameters cover tiny distances. Without adaptive units, half a millimeter displays as 0.005. With adaptive units this changes to 5mm.
Fixes
- Duplicating a grove collection would give two collections the same “unique” id, both using the same file on disk, one collection interfering with the other. Fixed with a quick check!
- Animate did not respect twig hiding, it does now.
- Wind building didn’t tag the object, causing scale and density to not be automatically updated.
- The Blender preference Interface > Translate > New Data could cause trouble while setting up material nodes. Fixed by manually naming the created nodes.
- When using different configurations for OpenColorIO, like ACES, the Non-Color color space may not exist, or it may have a different name. To not cause an error, The Grove now skips setting the color space for normal textures if it can’t find the Non-Color color space. Note that Non-Color is needed for correct normal maps, so you will have to manually set the normal map to a correct substitute color space.
Add some twigs
Pick up 3 twigs to receive a 10% Bundle Discount. Bundle up to 6 twigs or more for an awesome 20% Nesting Bird Discount! These twig models attach fluently to the trees you grow, and add incredible detail and realism. New twigs are on their way…

Japanese maple ‘Atropurpereum’
Acer palmatum ‘Atropurpureum’ – a cultivated variety of the Japanese maple tree, with deeply colored purple-red leaves. This slow grower is a wildly popular garden tree.

Spindle
Euonymus europaeus – Spindles are small trees, but they pack a punch with fiery fall colors and the pink-colored fruit looks absolutely out of this world.

Woodland hawthorn
Crataegus laevigata – a small tree from the rose family, hawthorn is closely related to apple trees. With abundant white flowers that later develop into clusters of red fruit.
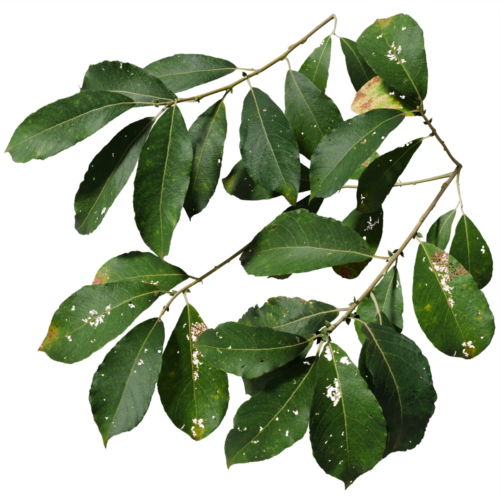
Goat willow
Salix caprea – goat willow is a rather inconspicuous tree, with no flashy flowers, fruit or autumn colors. It’s a modest tree that dots the landscape with touches of green.
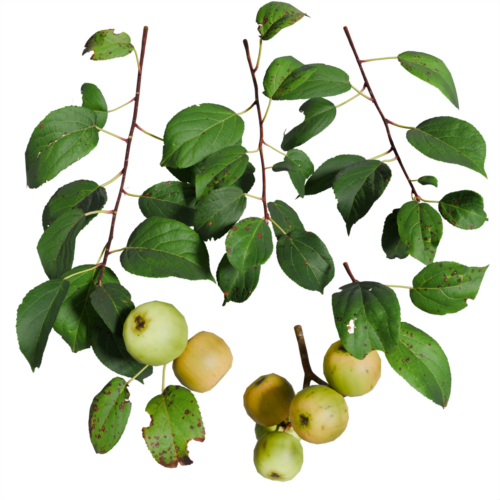
Wild apple
Malus sylvestris – now very rare, wild apples were once abundant along the edges of forests throughout Europe, bearing fruit significantly smaller than that of cultivated apples.