The Grove 0.2
The Grove 2
Advanced meshing
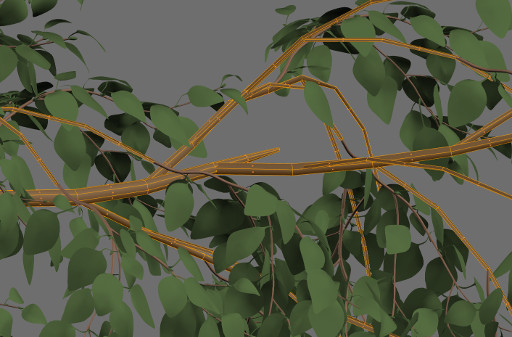
The Grove now builds branches in a more powerful way. Stepping away from Blender’s curves gives much more control and paved the way for some exciting new possibilities. Because of the advantages, Advanced Meshing is now the default, keeping the Curves build type as an option. Therefore, The Grove is now in the Add / Mesh menu.
Polygon reduction
Perhaps the most wanted feature is polygon reduction. Although twigs provide huge memory savings, the tree’s branches would still be quite heavy on memory.
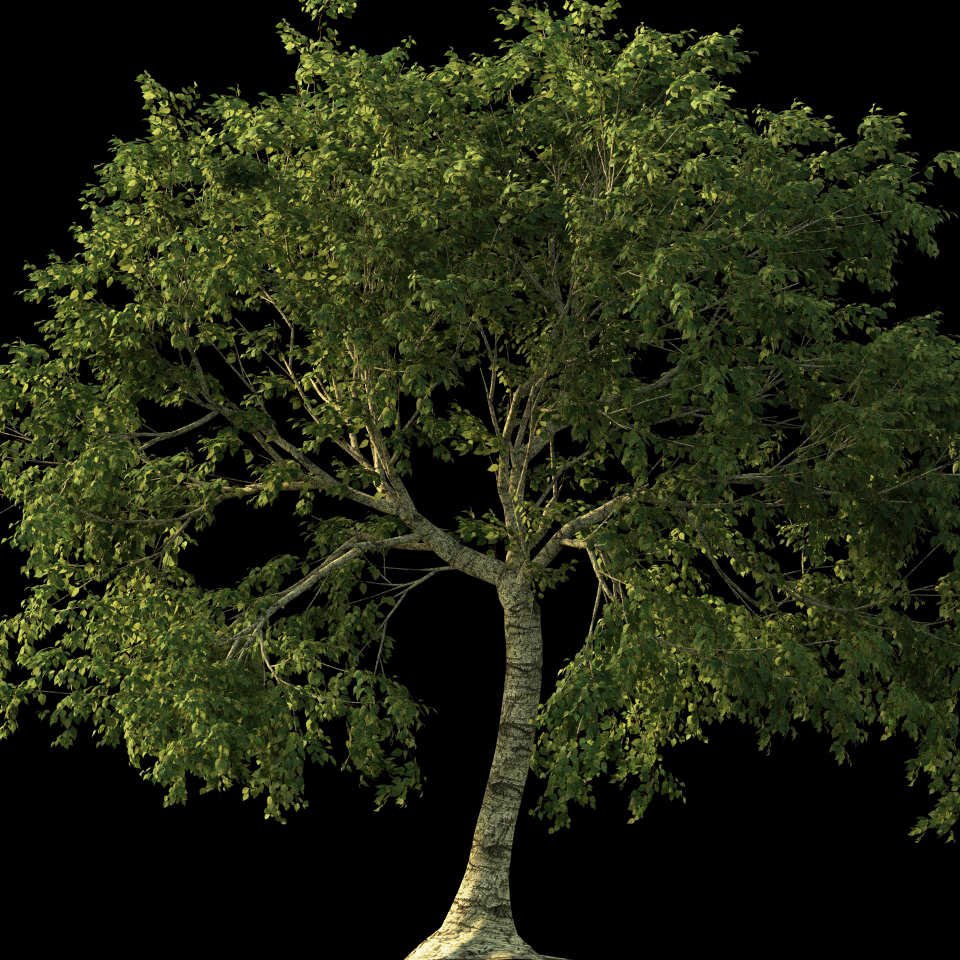
The Grove now gives control over branch profile resolution. Polygon reduction based on branch thickness allows high poly trunks with low poly end branches. Adding detail only where you need it can easily reduce polygons by 80% without much visible difference.
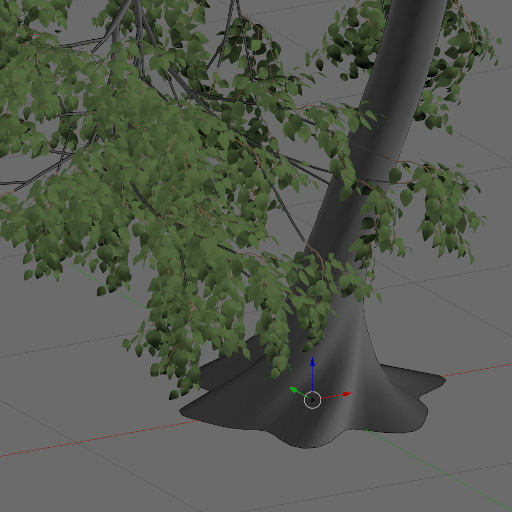
Root shapes and twisting
The new meshing also allows for more interesting trunk and branch shapes. A root profile controls the shape of the base by adding root protrusions. Branch twisting for species like Horse Chestnut, also making texture repeating a lot less noticable.
Presets
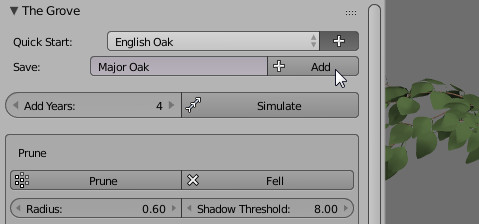
You can now save, share and load your own presets. Making it even more rewarding to experiment creating your own species. Once you’re satisfied with the look of a tree you grew, press the button to the right of the Quick Start presets. Enter the name of your tree and press Add to add it to the Quick Start menu. Enter the name of an existing preset to overwrite it.
UV unwrapping
Part of the new meshing is spot on UV unwrapping. A random UV offset for each branch now counters texture repetition.
Small changes
Several changes to the UI will streamline your workflow.
- Groves of trees grown together are now created as separate objects.
- Changed the text fields to object pickers.
- Twig duplicator objects are now conveniently parented to the tree’s branches.
- A tree now grows at the world origin instead of the 3D cursor location. Growing at the 3D cursor location can be confusing, especially for users new to Blender. Use an empty object to place your tree at a specific location, just like when growing multiple trees at once.
- UI tweaks moving parameters around for added clarity. Added white space for better visual grouping, and an enlarged Simulate button.
- Added the “Topiary” Quick Start preset. It’s not a beautiful tree in itself, use it to efficiently fill up a precise topiary object, slowly but surely.
- Change the incorrect naming of the Avoid force to Deflect.
- Add a property called “offset” to an Empty object, to add a time offset to that particular tree. It will only start growing after the offset years have past. This allows for more natural groups of trees. Note that by default when you add a property to an object – at the bottom of the object buttons – it’s maximum value is 1. So change that to say 100 and after that set the value to whatever offset you like.
- Several speed optimizations. Pruning is now roughly 4 times as fast.
Fixes
- Sometimes trees did not respect the starting locations, instead growing at random spots. Fixed!
- Environment blocking combined with bending wasn’t watertight. Some branches managed to escape. Fixed that!
Bugfix release 2A
- Release 2 introduced parenting the twigs to the branches. When using multiple trunks, this gave a wrong offset to the twig duplicator objects. Fixed!
- Twig distribution for opposite branching was broken, it created double twigs without mirroring them along the parent branch. Fixed!
- When growing trees together, a wrong order pruned one more than the other. Fixed!